Thanksgiving Utensil Holders
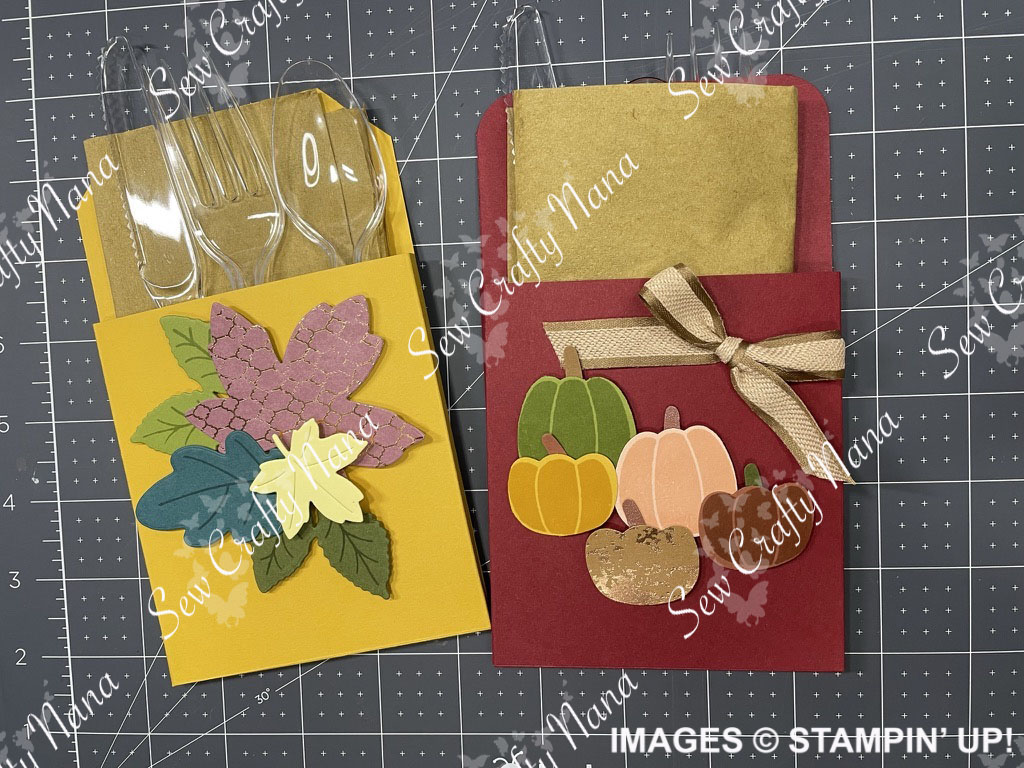
Aren’t these SUPER CUTE! We are having a large group of families for Thanksgiving. Having the utensils and a napkin all packaged together at each place setting worked out so nicely last year, I decided to do it again this year – DIY style! I had fun with a variety of colors and designs for this one. (Last year I purchased plain old kraft colored ones.)
Measurements:
- Cardstock 4” x 7 ½” – score on the 7 ½” side at 6 ¾” and 7”
- Cardstock 4 ½” x 5 ½” – score on the 5 ½” side at ½”, ¾”, 4 ¾” and 5” (essentially it is ½” and ¾” from each end)
- Decorate any way you like – with stamping, die cuts, ribbon, embellishments…
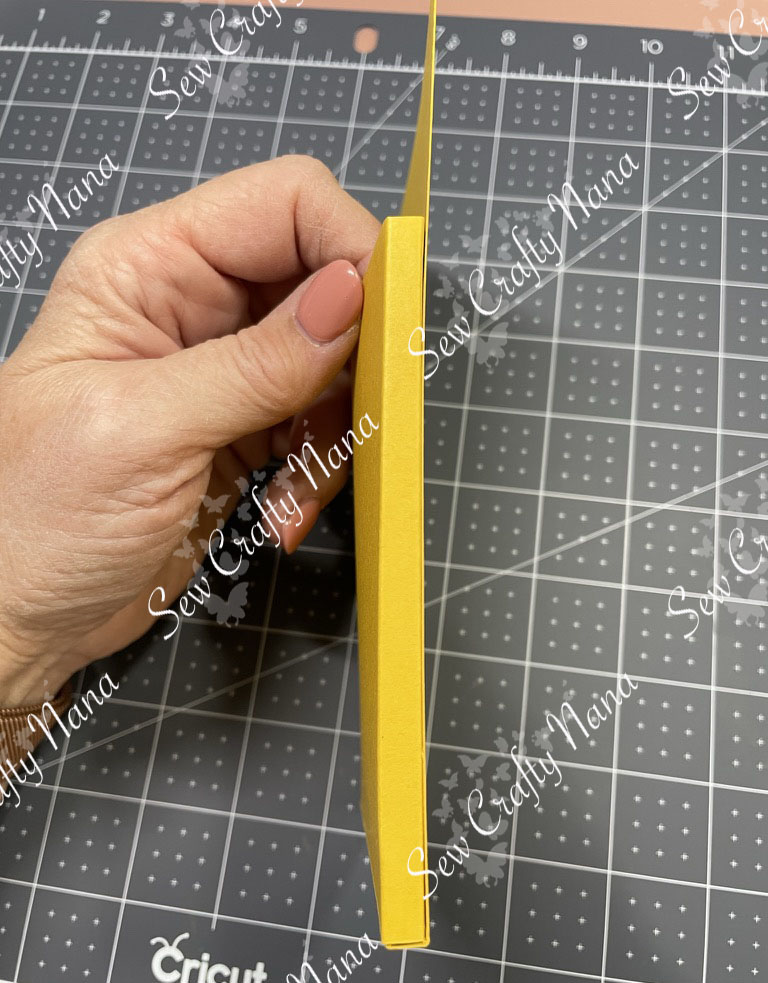
Finished size: 4” x 7 ½” with 4 ½” tall and ¼” deep pocket on the front.
In the photos below, you can see the thickness and my scoring guidelines.
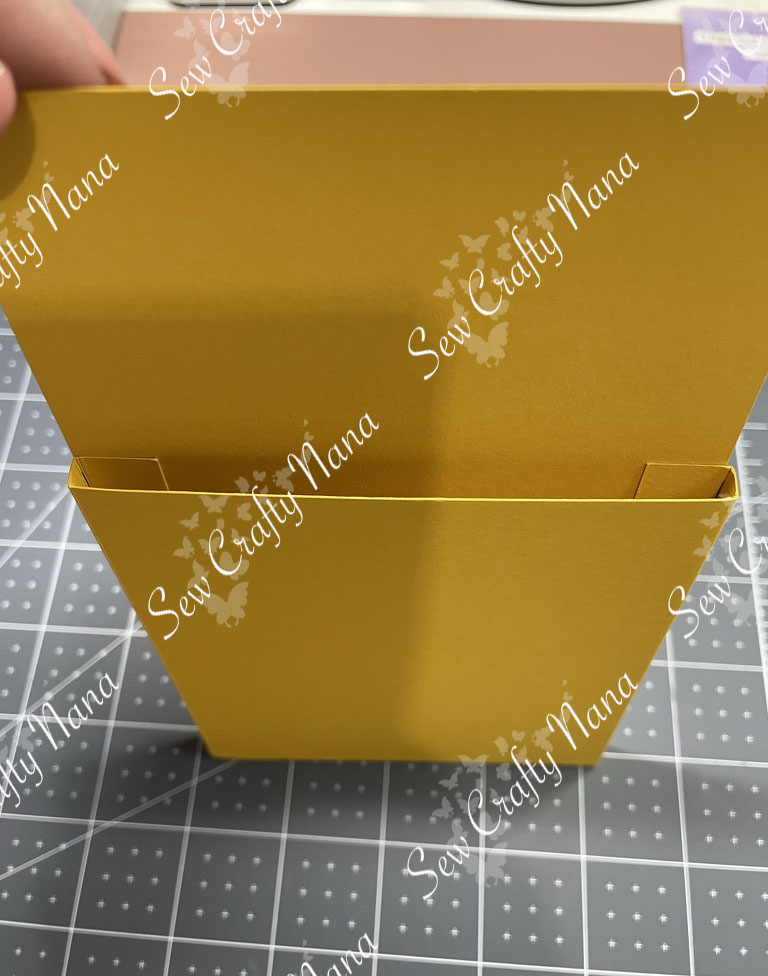

Assembly:

- Attach ½” tab A to front piece lower edge B between the score lines on B.
- Fold up and attach ½” tabs C and D to the back piece (inside pocket) aligning edges. This gives you the ¼” deep pocket at the bottom of the utensil holder.
- If desired, use a corner punch to create decorative corners at the top of the holder, or use a corner rounder to round those edges.
- Decorate as desired
I used Stampin’ Up! Tear & Tape (TNT) for my adhesive to put the holders together. The reason for that was I wanted to be able to apply the adhesive to a batch of them at a time and put them together assembly-line style. By leaving the cover on the TNT, you can stack them with no worries of them sticking together. Again, this was my preference, but any strong adhesive would work.
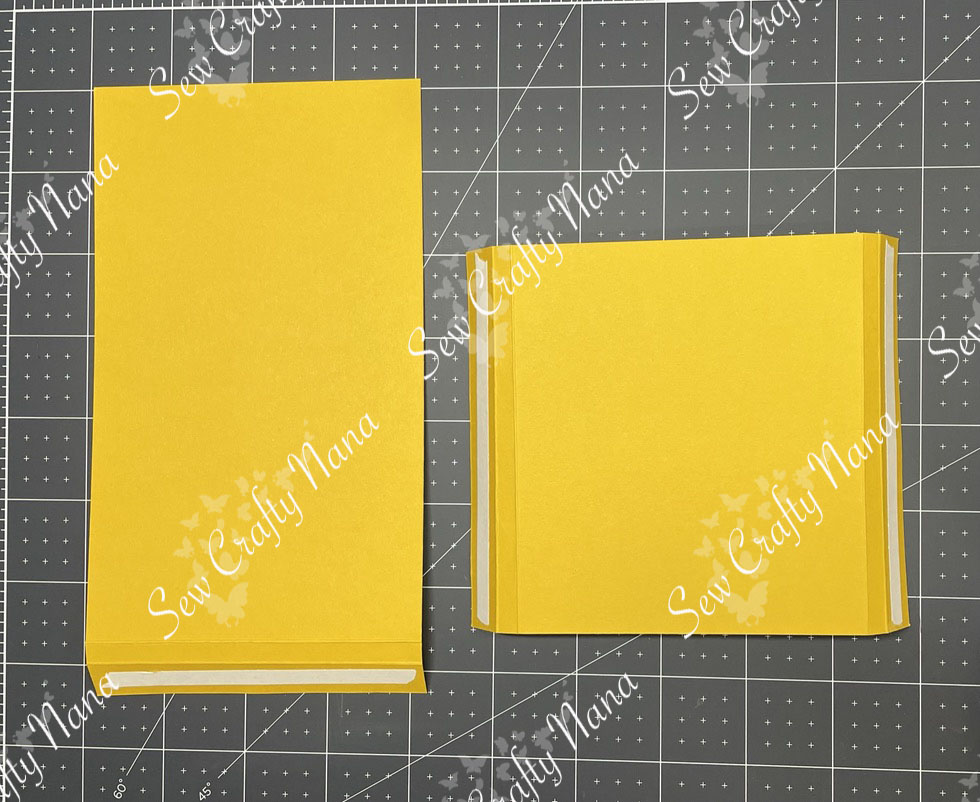
I sized the “tabs” at ½” to make it easy to use Stampin’ Seal or Stampin’ Seal + as well (or any other kind of tape runner you may use). ¼” was just slightly too small and I didn’t want to get into 1/8” measurements!!
You can play with the size of this to fit your needs and your napkins or flatware. Since it takes close to a full sheet of 8 ½” x 11” cardstock, I wanted to make sure my measurements fit one holder per sheet. There is some extra cardstock with my measurements, so that would allow some room for you to adjust and still get them out of 1 sheet. Most finished ones that I found were slightly narrower than this one, but I liked the 4” width. 7 ½” seems to work well for most utensils, but if you are using non-plastic utensils you may want to make them taller.
I pulled out my scrap bin for these and die cut leaves, flowers, and pumpkins from any color I felt would look “Fall-ish”. I chose a variety of cardstock and some specialty paper with metallic bits for extra sparkle. This was ALL done with scrap pieces – it took me a while but it was really gratifying to see my scrap bin decrease in size significantly.
There are a lot of ways to decorate these, depending on how many you are making. I’m making at least 30… so that’s why I spent time doing the die cutting first. You can also stamp a background, use masks and blending brushes, or use a Designer Series Paper (DSP) for these, just keep in mind the inside does show. One thing to keep in mind with DSP is that it is much thinner than cardstock – so they will be more delicate. I don’t think DSP would work if you were using real utensils, but it would probably be fine with plasticware.
Another idea I had was to decorate the pocket part like a little card. Either with just layers and a sentiment or even a card that opens with a message inside. That was a little too much for me with the quantity I was making – but something I think would be so fun!
Be sure to check out my YouTube channel for a full video assembly! https://youtu.be/iA_lD-oJFz8
I’ve seen most versions of these (and I purchased some last year) where there is no “gusset” (not sure if that’s what it’s called) in the pocket. Most are just flat. My problem with this is that the napkin and plasticware are not flat and I didn’t like how they pouched out. That’s why I’ve created this one with the ¼” clearance. It’s personal preference, of course.
I hope you’ll try some of these – whether it’s just 2 or many – and let me know how they work out! I’d love to see what you make!
Supply List:
- Cardstock – variety of colors – all from Stampin’ Up!
- Autumn Leaves Bundle
- Pick of the Patch Bundle
- Apple Harvest Dies – These are retired, but I only used them for the die cut flowers. You could use any die cut flowers or even the Petal Park Builder Punch would work great.
- Mini Stampin’ Cut and Emboss machine
- Paper Trimmer
- Very Best Trio Punch
- Tear & Tape
- Bone Folder
- Take Your Pick Tool
- Mini Glue Dots
- Stampin’ Dimensionals
- Crop-A-Dile Corner Chomper (or any corner punch will do – like THIS ONE)
