This two page 12 x 12″ layout was created using Digital files from Close to my Heart. This collection, called Cosette, is no longer available, but CTMH has other options for digital collections available. I have a couple of other digital collections yet to be used.
The really great thing about these digital file collections from CTMH is that they have individual images as well as a fully designed layout ready to cut as soon as you upload the files. The files are SVG, so any cutting machine that used SVG’s will work. I have a Cricut Explore Air 2 – which is pretty old, but does the job nicely.
A few things to remember when you go to cut a pre-designed layout: You have to hide the 12 x 12 layer (or delete it) – as Cricut will only cut up to 11.5″. No big deal because – logically – you don’t need to cut the 12 x 12 sheet anyway. That said, if you like to cut out the center of your 12 x 12 to preserve paper, you would still do that by hand with a paper trimmer.
This is the original Cosette Digital Layout:
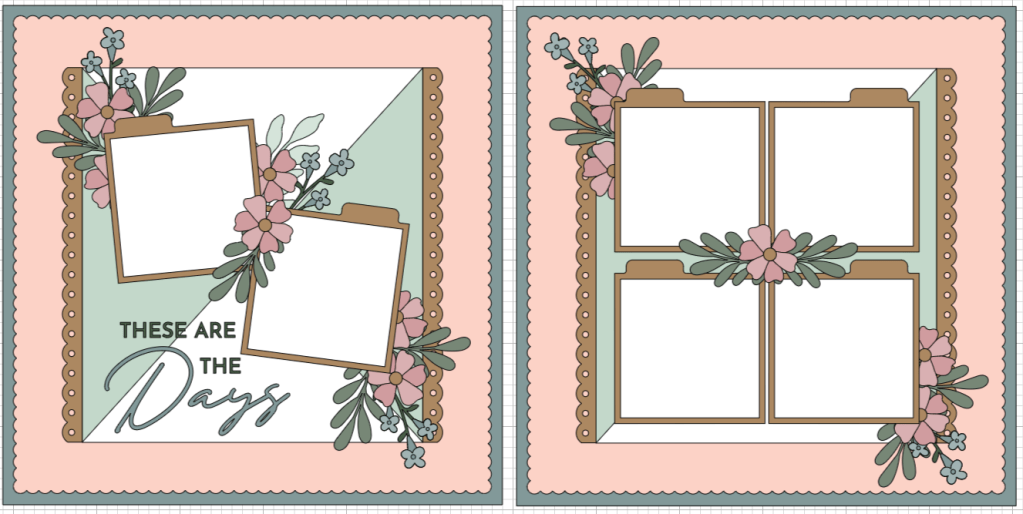
For my layout, I did make some changes. I don’t have CTMH cardstock, I have Stampin’ Up! cardstock and designer papers, so I used what I had. I also looked at some of the intricate cuts and decided against some of them. For this layout I wanted calm and pretty, so I didn’t want anything fussy on there. That meant removing the small flowers and stems, intricate leaves, and also the title. The spread also didn’t have space for journaling, unless you used one of the photo mats. I wanted some specific journaling spots, so that was on my list as well.
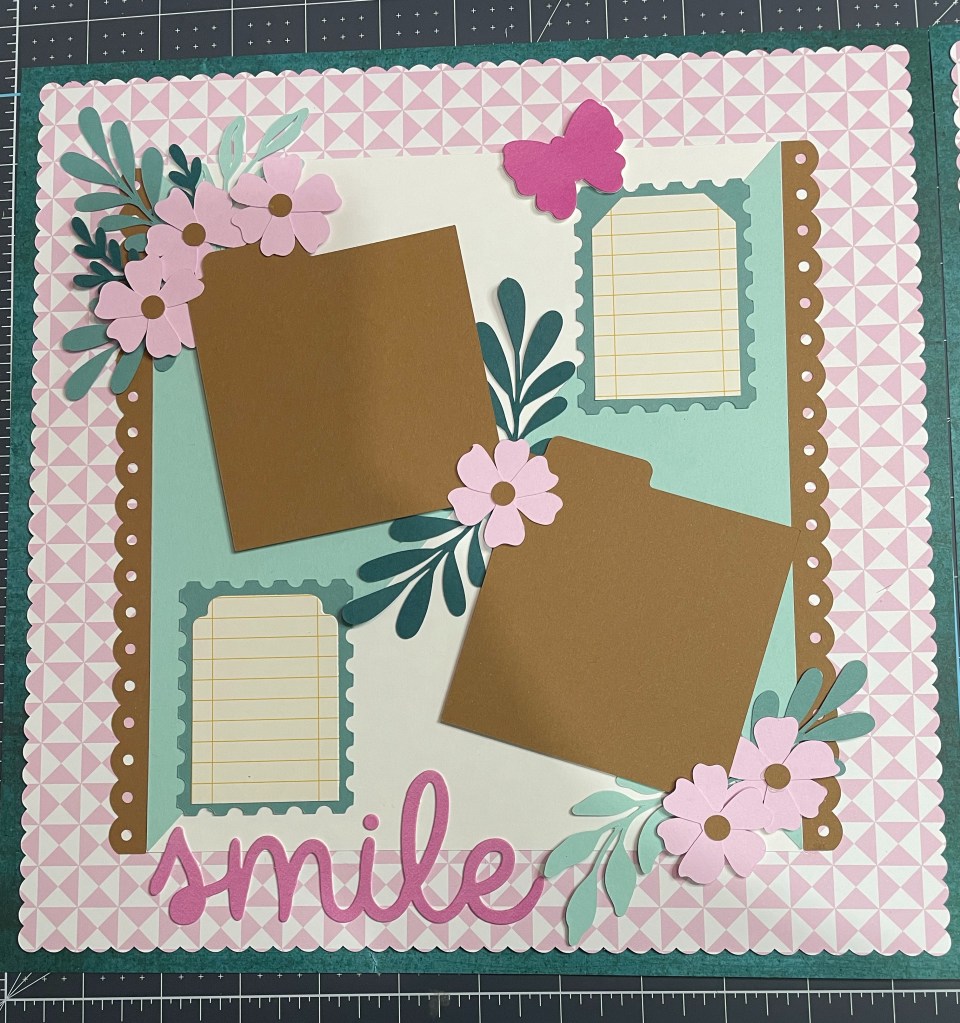
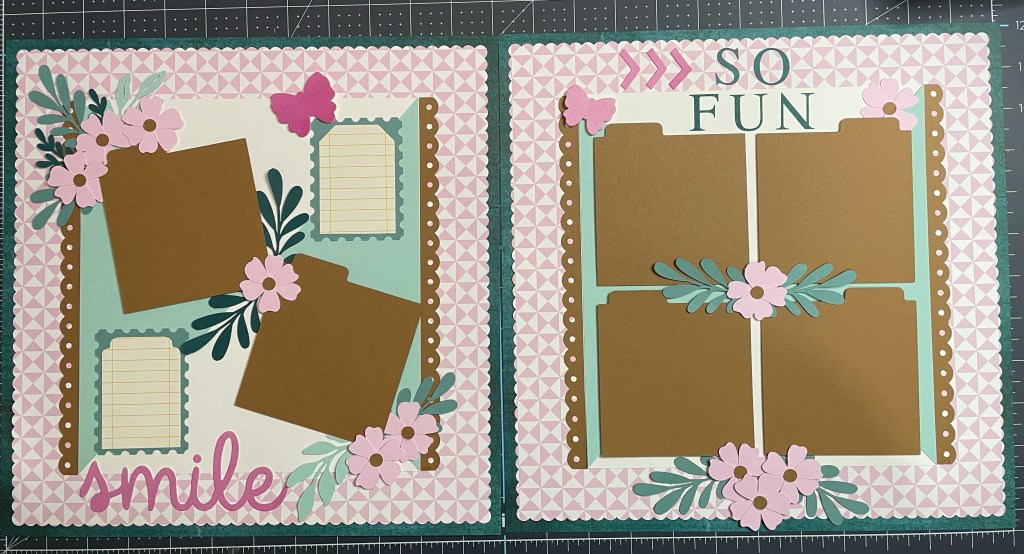
Looking at my left side page, I’ll run through what I used and how I made some of the decisions or changes. My 12 x 12″ base page is actually Designer Series paper from Stampin’ Up! from the Earthen Elegance pack. I loved this deep Pretty Peacock color and just a little bit of texture and variation in the print. Next I added the bubble bath pink patterned page, cut on my Cricut, from the Delightfully Eclectic 12 x 12″ paper pack. The photo mats and center box scalloped sides are from Pecan Pie cardstock. I was so impressed at how well my Cricut cut these pieces. The Stampin’ Up! cardstock is high quality and works well on the old Cricut. The center box is Basic White cardstock, with the triangles cut from Pool Party cardstock. The “box” is a little deceiving – it isn’t square. This threw me off a little when putting the triangles on – they only go one way! It is 9″ tall x 8 1/4″ wide – so when you add the scalloped sides it gives you that square effect.
Once I had the base down for both pages I started working on the photo layout – which I wanted to keep the same as the template – and a new title and journaling spots. I had cut these postage stamp mats from Lost Lagoon cardstock, along with all the other pieces. These were an extra image in the digital files. I decided those would mat my journaling pieces – which were cut out with the Tailor Made Tags dies. You could go with any variety of journaling options – circles, torn rectangles, plain cut rectangles, or you could alter the size of the photo mats to be smaller/rectangular and use that. There are lots of options. Using those took up the title space though, so I had to figure that out. I ended up using a paperboard die cut I got in a pack on clearance from Close to my Heart. I liked the Smile sentiment and then used some butterflies and arrows from that set too. It worked great!

The flowers and leaves for both sides of the layout were the larger flowers and leaves from the original layout. I slightly altered the placement of them – but I think these turned out beautiful. They were cut using Bubble Bath, Pecan Pie, Lost Lagoon, Pretty Peacock and Pool Party cardstock scraps. I put all of the photo mats and some of the embellishments up on Stampin’ Dimensionals (foam tape). Last thing was the title on the right side page. I had this huge spot at the top but I didn’t like the flowers up there. I kept moving things around and around – it was crazy! Eventually, I decided I needed something simple but dark – I had no dark elements on the right side and I had dark leaves on the left. I balanced it out using Pretty Peacock ink and the Classic Alphabet stamp set to add “So Fun”. I really love how this turned out!
What do you think? Would you have made different changes? Do you agree with some of my changes? Have you tried any digital files from Close to my Heart? I’d love to hear!
Products used:
- Stampin’ Up! (Shop Now)
- Earthen Elegance 12″ x 12″ Designer Series Paper #161503
- Delighfully Eclectic 12″ x 12″ Designer Series Paper #161640
- Pecan Pie 8.5 x 11″ Cardstock #161717
- Basic White 8.5 x 11″ Cardstock #159276
- Pool Party 8.5 x 11″ Cardstock #122924
- Lost Lagoon 8.5 x 11″ Cardstock #133679
- Bubble Bath 8.5 x 11″ Cardstock #161718
- Pretty Peacock 8.5 x 11″ Cardstock #150880
- Pretty Peacock Ink Pad #150083
- Tailor Made Tags Die Set #155563
- Stampin’ Dimensionals #104430
- Mini Stampin’ Cut & Emboss Machine #150673
- Classic Letters Stamp Set (Online Exclusive) #161267
- Close to my Heart (Shop Now)
- Cosette Digital Art Collection #X7291F
- Search for Digital Art to see all the other sets!
- Cricut Explore Air 2

Leave a comment