I created this two page 12 x 12 layout using patterned paper, cardstock, and some old stickers. I wanted something “sunny”, so I started with finding two papers with just yellow and white that I could use as my two pattern base pages. I will link any available products at the bottom of this post.
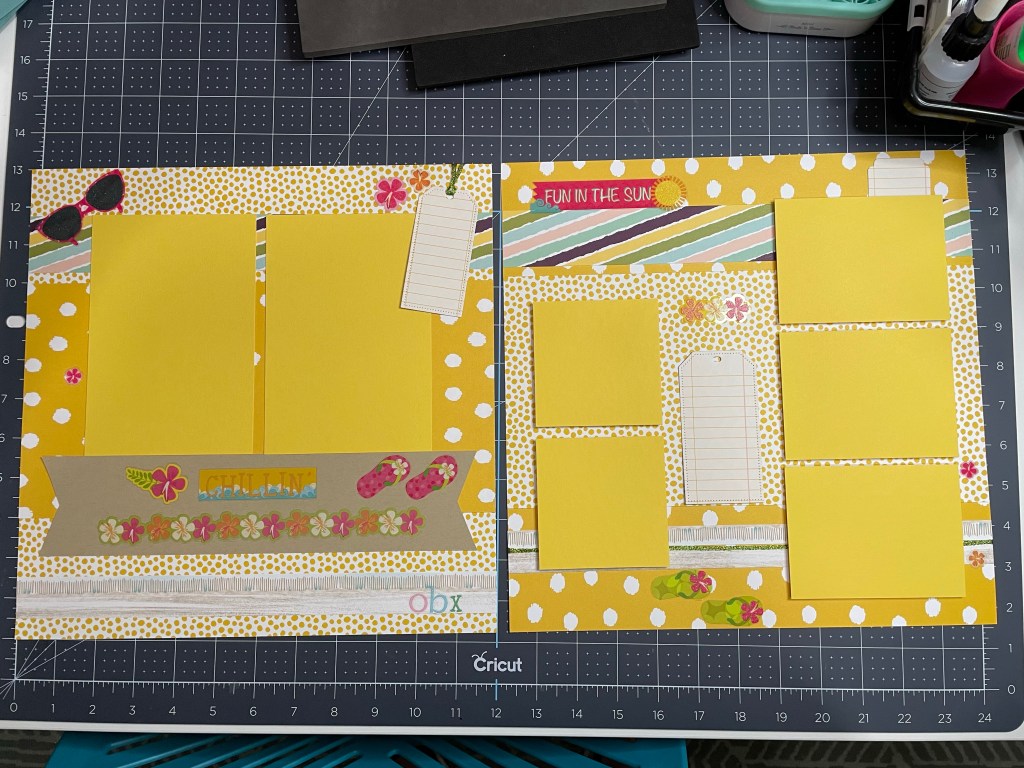
I chose two papers from the Delightfully Eclectic 12″ x 12″ Designer Series Paper pack with irregular yellow dots – one large dot and one small dot. I immediately decided I wanted to reverse their locations for the two pages. At this point, I was feeling like the center horizontal stripes was my plan, so I started looking for something to coordinate. I had seen a layout with the banner title page, so I threw in Crumb Cake cardstock for the banner. The multi-stripe pattern paper towards the top is from a retired Stampin’ Up! paper packet. I needed that to break up all the yellow and bridge the bright stickers I wanted to use.
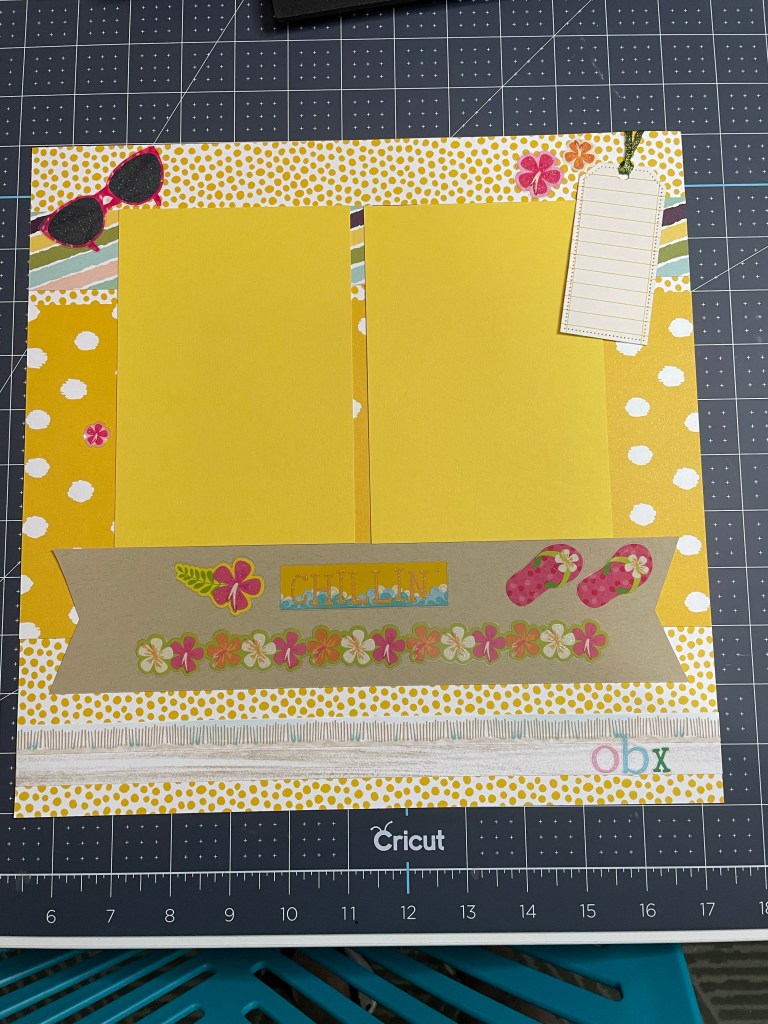
For the left page I wanted to include larger focal pictures, with the right being some coordinating / extra shots, so I chose two vertical 4 x 6″ photo mats – in Daffodil Delight cardstock. These mats are cut to 4 1/4″ x 6 1/4″ to give a small border around the photos.
For the banner, I cut a 2 1/2″ x 11″ rectangle and then cut in on each end 1/2″ in the center, then cutting to that point from each corner. This makes a nice banner without needing any special tools. You could also leave this as a rectangle or tear the ends and that would look nice too.
The background papers are cut as follows for both sides of the layout: Center contrasting piece is 6″ x 12″ and multi-stripe piece is 1 1/2″ x 12″. At the bottom of each layout I used some leftover Close to my Heart stickers I had – I think from two different workshops. You could use another patterned paper or contrasting cardstock here as well. I just wanted something to break up the page. That’s personal preference. Always lay out your pieces first and rearrange them until they please your eye – everyone’s taste is a little different.
The hanging tag at the top for journaling is a die cut from Stampin’ Up!. The set is called Tailor Made Tags and it includes a great basic set of nesting tags in two shapes. I cut this from another Designer Series Paper from the Delightfully Eclectic set, because it is already lined, but you could just as easily cut a tag shape by hand from plain cardstock. I just wanted something I could use to write a few lines about the photos. The last things on this page were the stickers – and they are very old… probably from Michaels many years ago.
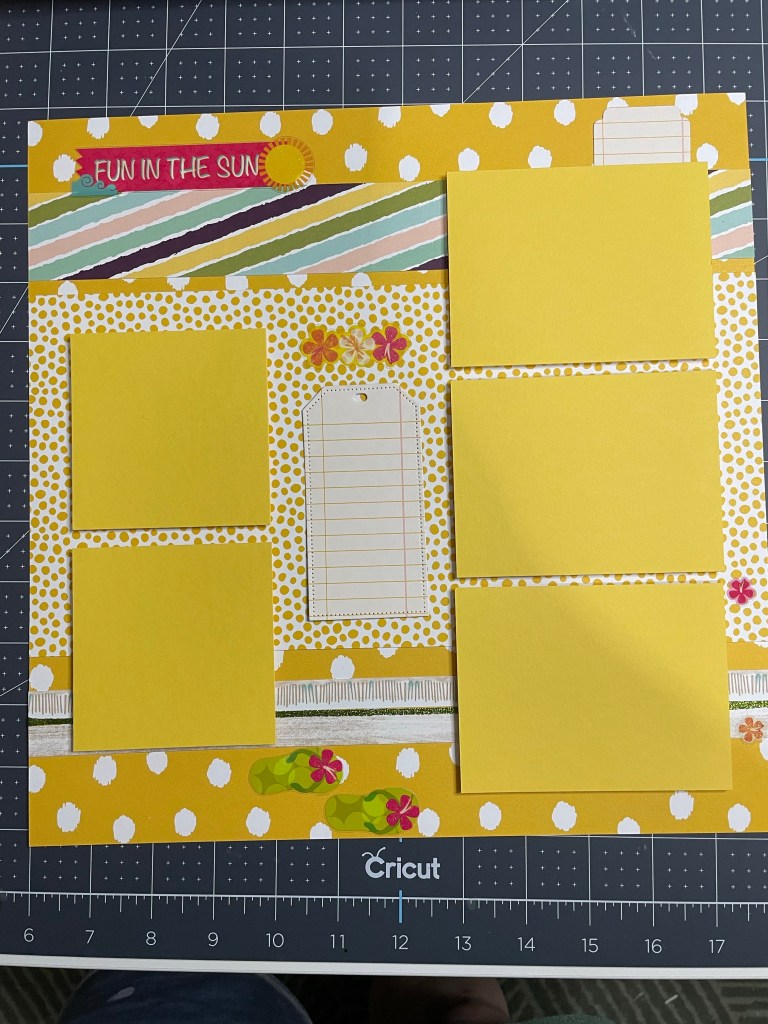
For the right side page, I reversed the background and 6″ piece of designer series paper, but added the same bordering stripes. I used photo mats in the same color cardstock but this time included two 3 1/4″ squares (for 3×3 photos) and three 3 1/4″ x 4 1/4″ (for 3×4 photos). I may actually cut a couple of the photos with a large circle punch or die to put in the square mats – just to break up all the rectangles… but we’ll see what pictures I end up with.
Again the tag in the middle is cut from the Delightfully Eclectic paper with the Tailor Made Tags dies. I haven’t actually attached it yet – as I want to journal on it before sticking it down. In addition, I added a little pop up tag in the top right, tucked behind that photo. I’ll write something on this as well, before sticking it down.
I really like how these came out so far – as I may add more embellishments to them once the photos are in. I’ll post another picture after they are completed with an update!
Supplies Used
- Stampin’ Up! (Click to Shop Now)
- Delighfully Eclectic 12×12 Designer Series Paper – #161640
- Tailor Made Tags die set – #155563
- Daffodil Delight Cardstock – #119683
- Crumb Cake Cardstock – #120953
- Mini Stampin’ Cut & Emboss Machine – #150673
- Clost to my Heart (Click to Shop Now)
- Cape Cod Scrapbooking Workshop Kit – #G1283

Leave a comment